Thinking about building a deck but not sure what pattern to use? Wondering which styles look best, save money, or make your deck feel custom-built?
In this post, you’ll learn all about the most popular deck patterns, how they’re built, and which ones give you the best bang for your buck.
By the end, you’ll have the confidence to choose a deck pattern for your deck building project that fits your style, budget, and space like a glove.

What Are the Most Common Deck Patterns?
When it comes to planning a dream deck, there are a handful of go-to deck patterns that dominate for good reason. They’re easy to understand, look great, and fit most outdoor living spaces without overcomplicating the process.
- Standard straight lay: The most common deck design, with boards running parallel to the house. Simple, clean, and efficient.
- Picture frame: A picture frame border adds polish and hides board ends. Great for composite decking or any high-end finish.
- Diagonal: This diagonal pattern creates movement and can make smaller spaces feel bigger. It works especially well with wider decks.
- Herringbone: A herringbone pattern creates a woven look using alternating board directions. It’s eye-catching but takes careful planning.
- Chevron: Similar to herringbone, but the boards create continuous V shapes. It’s modern and stylish, with a smooth flow.
- Patchwork or parquet: Uses boxed sections with boards in different orientations. Often used for geometric deck styles.
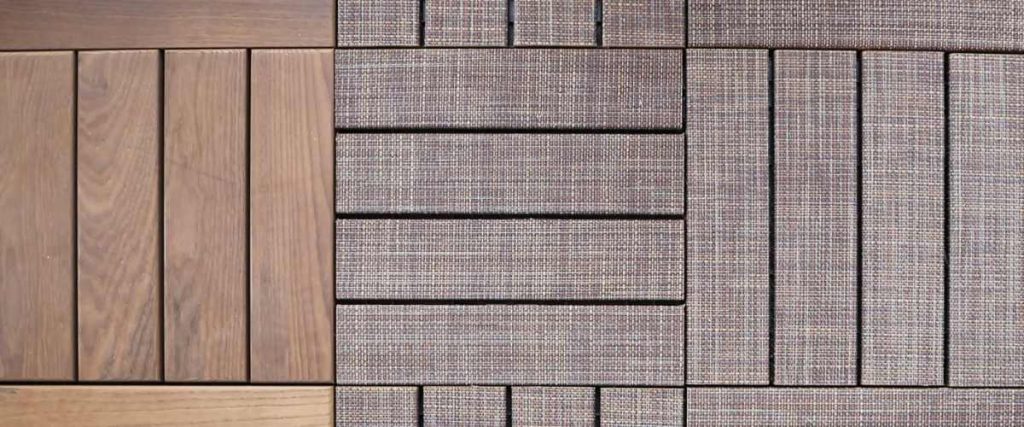
- Basket weave: Alternating vertical and horizontal boards in square frames. It adds visual interest with a clean, tile-like feel.
- Inlays: Adds a custom centerpiece like a diamond inlay or logo. Makes your deck one-of-a-kind.
Contact us today about your deck installation.
Cost-Effective Deck Patterns
How Patterns Save You Money
Many people don’t realize how much the length of your deck boards can affect the overall budget.
Longer boards (16′ or 20′) tend to cost more per foot and create more waste if your deck size doesn’t line up perfectly.
By choosing patterns that work with 8′ to 14′ boards, you can save up to $2.35 per square foot. That adds up quickly—on a 430-square-foot deck, that’s over $1,000 saved just by selecting a smarter layout.
Transition Board
A transition board is a single plank laid perpendicular to the rest of the deck boards, usually across the middle of the deck or between different zones.
It breaks up long runs of boards and helps hide seams, making it easier to use shorter pieces without an obvious stop-and-start look. It also adds subtle visual interest and can even act as a design element when done in a contrasting color or composite texture.
Patchwork or Checkerboard
This pattern divides the deck surface into square or rectangular sections where each zone’s boards are laid in a different direction, like alternating between horizontal and vertical.
It’s perfect for using up leftover wood or composite decking pieces of varying lengths, since each section can be trimmed to size independently. The result is a tidy, geometric style that feels organized but creative.
Picture Frame
While a picture frame border is often seen as a high-end finish, it’s also surprisingly practical.
By running a border around the deck (or around just certain zones), you can cleanly frame in shorter boards inside. This allows you to use more affordable lengths without awkward seams.
It also hides the rough ends of boards and gives your deck a crisp, polished look without a huge increase in material cost.
Herringbone and Chevron with Transition Boards
The herringbone pattern and chevron layout are usually considered complex. However, using a central transition board makes them much more approachable and affordable.
Instead of building a perfectly centered layout across the entire deck, you can split the surface into two mirrored sections. This reduces material waste, limits mistakes, and makes it easier to work with short boards or offcuts.
ATX Pattern
The ATX pattern was developed specifically to work with short-length deck boards and save material.
It features a repeating sequence that uses staggered joints and alternating directions to build a modern, almost tiled look.
While it’s more advanced and better suited for large outdoor living spaces, it’s a strong choice for commercial decks or big backyard projects where you want to keep costs down and still make a design statement.
Deck Patterns That Elevate Visual Appeal
Pinstripe Pattern
If you’re looking for something unique but understated, the pinstripe pattern offers a touch of elegance without overwhelming the deck.
It alternates narrow and wide boards in repeating sequences across the space, creating a rhythm and flow that feels modern and polished. This pattern works particularly well with composite materials that come in multiple widths.
It’s also a great way to break up a large, flat deck surface without using complicated framing or patterns.
Diagonal
The diagonal pattern shifts the orientation of your deck boards so they run at a 45-degree angle to the house or frame.
It’s a small change with a big visual payoff—it draws the eye outward, making the space feel more open and dynamic. A diagonal pattern also helps with water runoff, which is a bonus for durability.
While it requires a bit more cutting and substructure planning than a straight lay, it gives the whole deck a sense of movement and energy that flat, horizontal boards can’t match.
Herringbone
The herringbone deck pattern creates a woven, V-shaped texture using alternating board directions.
It’s one of the most visually complex and decorative layouts you can choose, often found in upscale spaces or urban outdoor lounges. To pull it off, the framing beneath the deck needs to be built specifically to support the angled cuts and extra seams.
But the payoff is huge—it transforms the entire deck into a high-end design statement.
Chevron
Chevron looks similar to herringbone but has a slightly different construction.
In a chevron pattern, the boards are cut at an angle and meet point-to-point in a continuous line, creating strong, modern V-shapes across the deck. It’s a cleaner, more fluid version of herringbone that feels sharp and contemporary.
Inlays and Custom Centerpieces
An inlay takes a section of your deck and turns it into a piece of art.
This could be something like a diamond inlay placed in the middle of the space, a compass rose, or even initials carved out with contrasting deck boards.
Inlays require extremely precise planning and cuts, often with custom framing beneath to support the pattern. They work best on larger decks where there’s room to let the design breathe.
While they’re labor-intensive, they give your deck a focal point no one else will have—and that’s the true meaning of a custom look.
Deck Patterns with Borders
Picture Frame Border
This is the most common type of deck border because it looks great and hides cut ends at the edge of the deck.
A picture frame border runs around the outer edge of the deck and can be made using the same color boards as the rest of the deck or a complementary shade for contrast.
A picture frame border also helps to visually separate the deck from surrounding landscaping or patio features.
Double Border
If you want to make a stronger design statement, a double border adds even more depth and structure to your layout.
This involves adding two separate frames around the deck edge, usually with a small gap or different color between them. It creates a high-end, layered effect that’s often seen on larger decks or decks that feature multiple pattern zones.
The double border helps define the outer edge of the space while also drawing the eye inward, almost like a built-in decorative rug.
Breaker Board Borders
Breaker boards, also known as transition boards, are installed perpendicular to the deck boards and are typically placed in the middle of the deck or between sections.
They serve a functional role by breaking up board runs and minimizing butt joints, especially when using shorter boards. However, they also work as a type of border between pattern changes or different orientation zones.
You’ll often see them used in large decks with chevron, herringbone, or patchwork layouts to keep the visual flow under control and make installation easier.
Framed Patchwork or Tile Layout
This border strategy takes patchwork to the next level by framing each section or tile individually.
It’s most common in geometric designs like basket weave, parquet, or checkerboard patterns. Each box or square is outlined with a deck board to give the layout more definition and structure.
Framing each tile section adds clarity and elegance to what might otherwise feel like a busy or chaotic pattern. It also allows for more flexibility with board orientation and length inside each framed unit.
Geometric and Specialty Patterns
Tile, Grid, or Parquet
This pattern divides the deck into equal-sized sections—usually squares or rectangles—then changes the direction of the boards within each section.
Think of it like a wood floor laid in a checkerboard or parquet layout. It gives your whole deck a structured, balanced appearance that feels both creative and clean.
This deck board pattern works best on medium to large decks where each tile section can be clearly defined and spaced evenly.
Basket Weave
A basket weave pattern alternates the direction of two or more deck boards in a square layout, creating the look of overlapping slats.
It’s a classic pattern borrowed from hardwood floors and translates beautifully to an outdoor space when done with composite or wood boards. The contrast between horizontal and vertical boards adds texture and rhythm, especially when paired with transition boards or framed sections.
X, Diamond, Triangle, and Heptagon Patterns
These shapes bring a lot of geometric energy to a deck surface, but they’re typically best reserved for very specific designs. They require precise layout planning and often a custom substructure to support the cuts and angles.
- A diamond inlay can serve as a bold centerpiece.
- An X-pattern might define the layout of a multi-section deck.
- Triangle and heptagon shapes can be used in standalone decks or large custom builds where the shape of the deck itself is part of the overall layout.
Directional Layout Variations
Horizontal (Standard Straight Lay)
This is the simplest and most common board layout—deck boards run parallel to the house.
It’s the easiest to install, creates minimal waste, and provides a clean, no-frills look. Horizontal layouts are great for smaller spaces, straightforward decks, or anyone who wants to keep the focus on the surrounding view or outdoor furniture rather than the deck itself.
Vertical Layout
In a vertical layout, deck boards are installed perpendicular to the house instead of parallel.
This orientation can make narrow decks appear deeper and is often used as a decorative choice in framed or picture frame borders. It works well on short decks with a strong linear shape or as an accent in combination with other layout styles.
Diagonal Layout
Installing boards on a diagonal gives your deck an instant boost in movement and flow.
The 45-degree angle works especially well in square or rectangular decks and helps draw the eye outward, making the whole space feel more open. This layout also improves drainage and can even increase the durability of the deck over time, but it does require more cutting and stronger framing support underneath.
Which of these three deck patterns is best?
Transitional and Mixed Layouts
Transitional Layouts
This approach blends two or more patterns, often using transition boards to separate them.
You might have a diagonal pattern in one area and straight boards in another, with a clear border between them. Transitional layouts are especially useful in large or L-shaped decks where one style might not suit the entire space.
Alternating Widths, Colors, and Textures
Even if you stick with a simple pattern, you can create major visual interest by alternating the width of your deck boards.
Wide and narrow boards can be arranged in repeating sequences to create rhythm and movement. Switching up the deck colors or texture of the boards—from smooth to grooved composite—adds even more depth.
These changes are subtle but powerful, and they don’t require any extra framing or special installation methods.
Edge Detail Styles for Deck Borders
Flush
A flush edge means the outer boards end right in line with the frame.
It’s a clean, minimalist choice that works well with modern homes and narrow decks. This style doesn’t extend past the joists, so it offers a tight, contained look with very little overhang.
Boxed In
This edge style uses a picture frame border to wrap the edge of the deck.
It hides board ends and gives the deck a polished outline that pairs perfectly with decorative inlays or geometric patterns. Boxed-in edges are common in composite decking projects because the material’s clean edges enhance the framed finish.
Overhang
With an overhang, deck boards extend slightly beyond the frame, usually by about an inch.
This adds a subtle shadow line along the edge of the deck and can help with water runoff. It’s a traditional look that also gives a little extra protection to the fascia and risers below.

From Concept to Patterned Perfection—Let Hard Decks Help You Build It
Hard Decks brings expert craftsmanship and creative deck design to homes across northeastern Illinois. Whether you’re dreaming of a clean picture frame border or an intricate herringbone deck pattern, we can build it with precision and care.
If you’re ready to build a deck that turns heads and lasts for years, call +1 (815) 706-4648 or fill out our contact form today. Your perfect outdoor space starts with the right pattern—and the right team.
